How Gutters Are Attached: A Step-by-Step Guide for Homeowners

How gutters are attached is a critical process that ensures your home remains protected from water damage, especially in a rain-prone city like Auckland. With its lush vegetation, heavy rainfall, and occasional storms, Auckland homes require gutters that are not only properly installed but also durable and well-maintained. Whether you’re a DIY enthusiast or considering hiring a professional, understanding the attachment process is essential. In this comprehensive guide, we’ll walk you through every step of attaching gutters, from preparation to installation and maintenance. By the end, you’ll have the knowledge to safeguard your home against water-related issues effectively.

Understanding Gutters and Their Components

Before diving into the attachment process, it’s important to understand the anatomy of a gutter system and the materials commonly used in Auckland homes.

Types of Gutters Commonly Used in Auckland

Gutters come in various materials, each suited to different budgets and environmental conditions:

  • Aluminum Gutters : Lightweight, rust-resistant, and affordable, making them ideal for Auckland’s humid climate.
  • Steel Gutters : Known for their strength and durability, though they require regular maintenance to prevent rust.
  • PVC Gutters : Budget-friendly and easy to install, but less durable than metal options, especially in extreme weather.
  • Copper Gutters : A premium choice offering unmatched longevity and aesthetic appeal, though at a higher cost.

Choosing the right material depends on factors like budget, climate resilience, and the architectural style of your home.

Key Components of a Gutter System

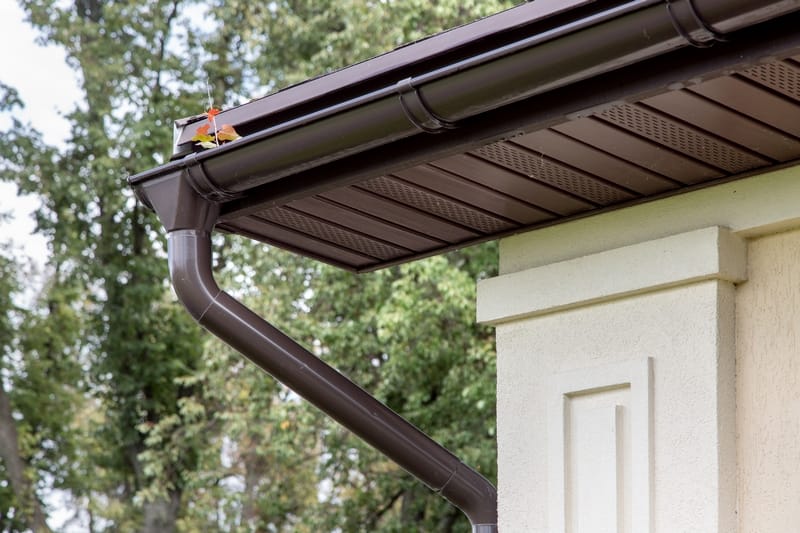
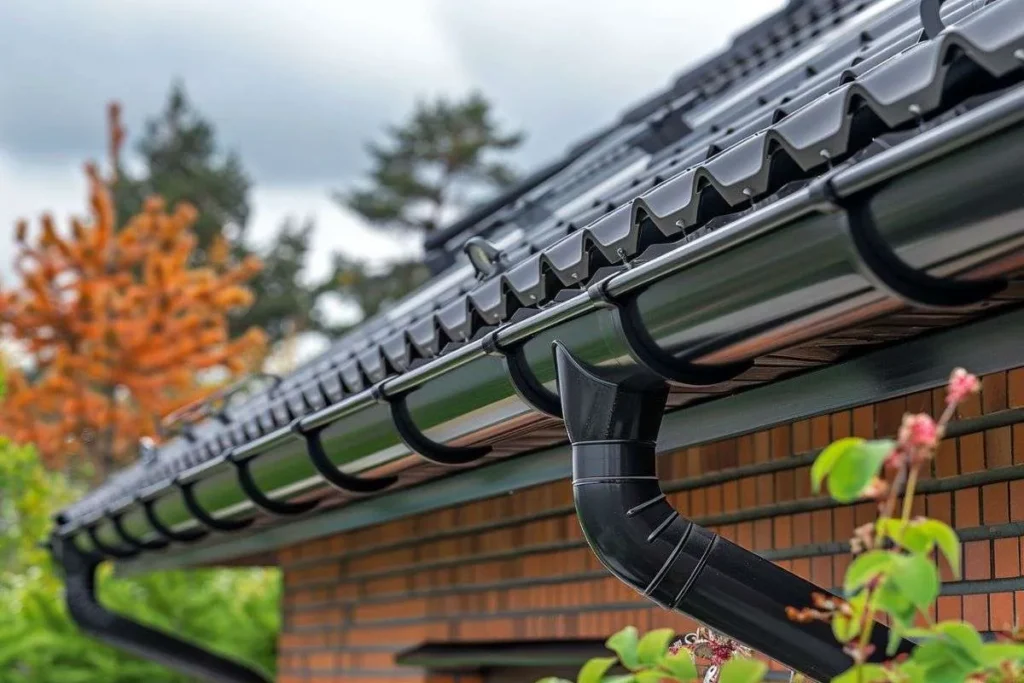
A gutter system is more than just a trough; it’s a network of interconnected parts working together:

  • Gutter Troughs : The main channels that collect rainwater as it flows off the roof.
  • Downspouts : Vertical pipes that direct water away from the foundation and into drainage systems.
  • End Caps : Sealed ends that prevent water from leaking out of the gutter system.
  • Hangers/Brackets : Fasteners that secure the gutters to the fascia board, ensuring they stay in place during heavy rain or wind.
  • Flashing and Sealants : Waterproof barriers that prevent leaks at critical points, such as where the gutter meets the roofline.

Understanding these components will help you appreciate the complexity of the installation process and ensure you’re prepared for every step.

How gutters are attached

Factors to Consider Before Installation

Before attaching gutters, consider the following:

  • Roof Type : Auckland homes often feature tiled, metal, or shingle roofs, each requiring specific gutter attachment methods.
  • House Design : Complex rooflines or steep pitches may necessitate custom solutions.
  • Local Building Codes : Auckland Council guidelines recommend discharging stormwater at least 2 meters away from the foundation—a key factor in downspout placement.

Taking these factors into account ensures your gutter system is both functional and compliant with local regulations.

Step-by-Step Process of Attaching Gutters

Now that you understand the basics, let’s explore the detailed steps involved in attaching gutters.

Pre-Installation Preparation

  1. Assessing the Roofline and Eaves
    Begin by measuring the length of your roofline to determine the amount of gutter material needed. Check the slope of your roof to ensure proper water flow toward the downspouts. A slight slope of about 1 inch per 40 feet is standard for efficient drainage.
  2. Gathering Tools and Materials
    Essential tools include:
    • Ladder
    • Drill and screwdriver
    • Measuring tape
    • Level
    • Chalk line
    • Tin snips or a hacksaw
  3. Materials required:
    • Gutters (aluminum, steel, PVC, or copper)
    • Hangers/brackets
    • Screws and nails
    • Silicone sealant
    • Downspout components (elbows, extensions)

Ensuring Safety
Always prioritize safety when working at heights. Use a stable ladder and wear a safety harness if necessary. If possible, work with a partner to avoid accidents.

Installing the Gutter System

  1. Marking the Slope
    Use a chalk line to mark a slight slope along the fascia board. This ensures water flows smoothly toward the downspouts without pooling.
  2. Attaching Gutter Brackets/Hangers
    Space brackets evenly—typically every 24-36 inches—and secure them to the fascia board using screws or nails. Ensure the brackets are level and aligned with the marked slope.
  3. Fitting the Gutter Troughs
    Cut the gutters to size using tin snips or a hacksaw. Join sections with connectors and apply silicone sealant to all joints and seams to prevent leaks.
  4. Installing Downspouts
    Position downspouts at corners or low points of the roofline. Attach elbows and extensions to direct water away from the foundation. Ensure the discharge point is at least 2 meters away from the house, as per Auckland Council guidelines.
  5. Sealing and Testing
    Apply sealant to all joints and seams. Test the system by running water through it using a garden hose. Check for leaks, improper slopes, or weak fittings, and make adjustments as needed.

Post-Installation Checklist

After installation, inspect the system thoroughly:

  • Ensure all brackets are securely fastened.
  • Check for leaks or loose fittings.
  • Verify that downspouts discharge water at least 2 meters away from the foundation.

Challenges Specific to Auckland Homes

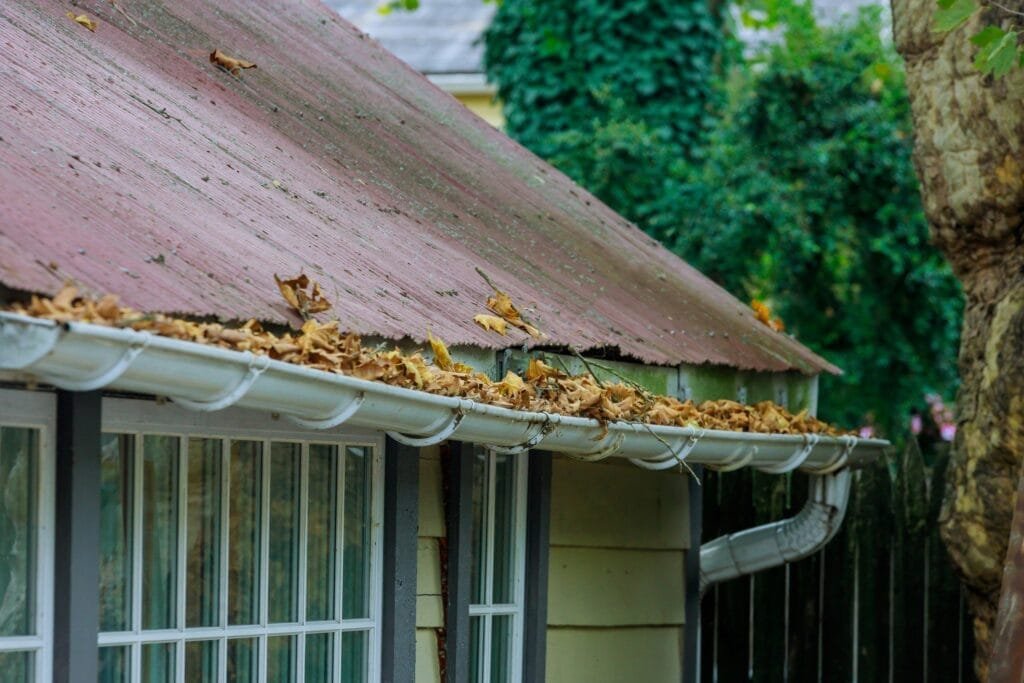
Auckland’s unique climate presents specific challenges for gutter systems:

  • Heavy Rainfall : Choose gutters with adequate capacity to handle intense downpours.
  • Leaves and Debris : Install gutter guards to prevent blockages caused by Auckland’s lush vegetation.
  • Rust and Corrosion : Opt for rust-resistant materials like aluminum or PVC to combat humidity.
a black roof with gutter in auckland
a beautiful gutter system in Auckland

DIY vs. Professional Installation

Pros and Cons of DIY Installation

While DIY installation can save money, it requires time, skill, and attention to detail. Mistakes like improper slopes or weak brackets can lead to costly repairs.

Benefits of Hiring a Professional

Professionals bring expertise, high-quality materials, and warranties. They’re especially valuable for complex rooflines or heritage homes.

How to Choose a Reliable Gutter Installer in Auckland

Look for licensed, insured installers with positive reviews. Request quotes from multiple providers to compare services and pricing.

Maintenance Tips for Long-Lasting Gutters

Regular maintenance ensures your gutters function effectively year-round:

  • Clean Gutters Regularly : Remove leaves, twigs, and debris to prevent clogs.
  • Inspect for Damage : Check for sagging, leaks, or rust, and repair promptly.
  • Use Gutter Guards : These minimize maintenance needs by blocking debris.

FAQs

About Gutter Attachment

A: At least twice a year—once in spring and once in autumn—to remove debris buildup.

A: Yes, but only if you’re comfortable working at heights and have the necessary tools. Otherwise, hire a professional.

A: Aluminum is ideal due to its rust resistance and affordability.

Conclusion

Properly attached gutters are essential for protecting your Auckland home from water damage. By understanding the installation process, choosing the right materials, and maintaining your system, you can ensure your gutters perform flawlessly for years to come.

Ready to take action? Whether you’re tackling the project yourself or hiring a professional, prioritize quality and durability. For expert advice or installation services, contact a trusted gutter specialist in Auckland today.

×