Step-by-Step Guide to a Successful Bathroom Renovation in Auckland

A modern, well-designed bathroom isn’t just a luxury—it’s a game-changer for your Auckland home. It can boost your property’s value, improve daily comfort, and create a space that feels like a personal retreat. In a city like Auckland, where the average home price hit $1.2 million in 2024, according to REINZ, a bathroom renovation can add up to 5% to your resale value, making it a smart investment. But renovating in Auckland comes with challenges—humid climates, older homes with tricky plumbing, and strict building regulations can complicate the process. Whether you’re in a character villa in Mount Eden or a modern apartment in the CBD, a successful bathroom remodel requires careful planning and execution. From outdated layouts in Papatoetoe homes to poor ventilation in Titirangi’s bushy settings, we’ve seen it all. This step-by-step guide will walk you through the process, ensuring your renovation is smooth, stylish, and compliant with NZ standards. For professional support, My Homes Construct Ltd is here to deliver a seamless, high-quality remodel tailored to Auckland’s unique homes.

Step 1: Plan Your Renovation Goals

Every successful bathroom renovation starts with a clear plan. Defining your goals ensures the project aligns with your needs, lifestyle, and budget, setting you up for success in Auckland’s competitive property market.

  • Define what’s not working in your current space:
    • Identify pain points—does your bathroom lack storage, feel cramped, or have outdated fixtures? In older Mount Eden villas, small layouts and poor lighting are common issues, per local renovation trends.
    • Consider usage—do you need a family-friendly space with a bathtub, or a sleek, minimalist design for a CBD apartment? Pinpointing these needs shapes the entire project.
    • Note any structural issues, like leaks or mould, which are prevalent in Auckland’s humid climate, averaging 70% humidity in summer, per NIWA data, requiring immediate attention.
  • Consider functionality, layout, and resale value:
    • Think about functionality—adding a double vanity can ease morning rushes for families in Papatoetoe, while a walk-in shower suits ageing-in-place designs in Remuera, per 2024 Houzz NZ trends.
    • Plan a layout that maximizes space and light. In North Shore homes, large windows can enhance ventilation and views of the Hauraki Gulf, boosting both livability and appeal.
    • Focus on resale value—neutral designs with modern fixtures, like a rain shower or underfloor heating, can increase your home’s marketability, a key consideration in Auckland’s pricey market.
  • Establish your budget:
    • Set a realistic budget—mid-range bathroom renovations in Auckland cost $15,000–$25,000, while luxury upgrades can reach $50,000, per 2024 Builderscrack data, depending on materials and labour.
    • Factor in a 10–15% contingency for unexpected costs, such as hidden plumbing issues in Parnell’s older homes, ensuring you’re prepared for surprises, per industry best practices.
    • Prioritize spending—allocate more to essentials like waterproofing and plumbing, which must meet NZ Building Code Clause G1 (Personal Hygiene), rather than splurging on decorative elements.

Planning Tip: Create a mood board with inspiration from Kiwi design blogs or the Auckland Home Show, helping you visualize your dream bathroom while keeping your goals focused and achievable.

A solid plan sets the foundation for your renovation, ensuring your new bathroom meets both your immediate needs and long-term goals in your Auckland home.

Step 2: Choose a Design & Layout

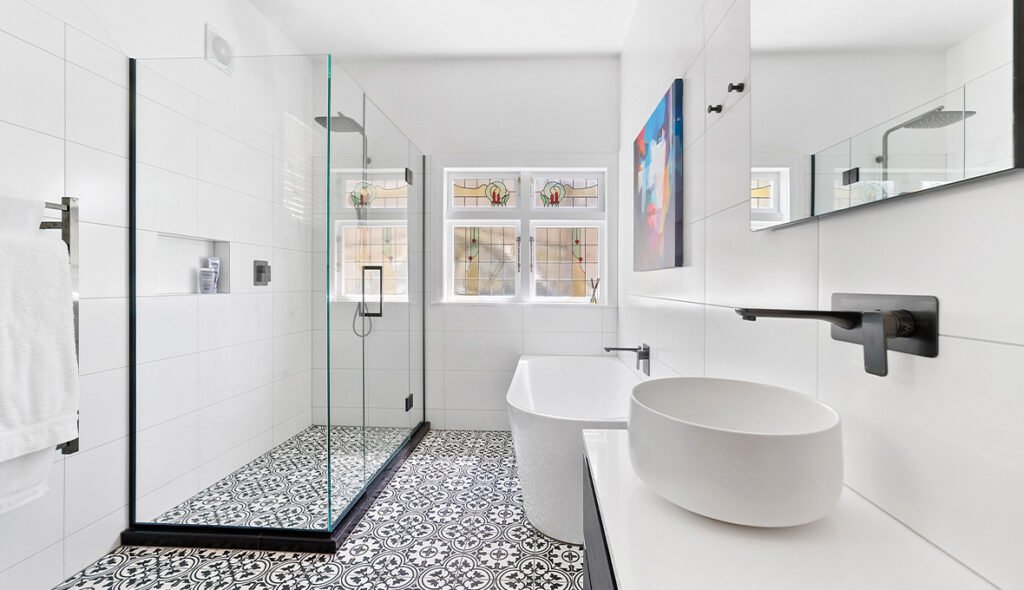
The design and layout you choose will define your bathroom’s look, feel, and functionality. In Auckland, where homes vary from heritage villas to modern builds, tailoring your design to your space and NZ regulations is key.

  • Popular bathroom styles in NZ (minimalist, modern, traditional):
    • Minimalist designs with clean lines and neutral tones, like soft whites or greys, are trending in Remuera, offering a timeless look that suits Auckland’s contemporary homes, per 2024 Houzz NZ reports.
    • Modern styles with sleek fixtures, such as black tapware or frameless glass showers, are popular in the CBD, adding a touch of luxury to compact apartments, per local design trends.
    • Traditional styles with clawfoot tubs and ornate details suit heritage homes in Parnell, blending classic charm with modern functionality, a style often showcased at the Auckland Home Show.
  • Optimize for natural light and ventilation:
    • Maximize natural light with large windows or skylights, especially in North Shore bathrooms, where coastal views can enhance the space, per NIWA’s data on Auckland’s 2,000 annual sunshine hours.
    • Ensure proper ventilation to combat Auckland’s humidity—install an exhaust fan (minimum 25 L/s airflow, per NZ Building Code Clause G4) to prevent mould, a common issue in Titirangi’s bushy settings.
    • Use frosted glass or light-filtering blinds for privacy without sacrificing brightness, keeping the space airy and fresh, a practical solution for Mount Eden’s smaller bathrooms.
  • Consider building regulations and plumbing limitations:
    • Check Auckland Unitary Plan rules—structural changes or additions, like moving a wall, may require a building consent, per the Building Act 2004, especially in heritage zones like Parnell.
    • Assess plumbing limitations—relocating a toilet or shower in older Papatoetoe homes can be costly due to concrete slabs, often requiring a plumber’s expertise, per NZ Building Code Clause G1.
    • Ensure the layout complies with NZ Building Code Clause E3 (Internal Moisture)—wet areas must have proper falls (1:100 slope) to drains, preventing water pooling, a must in Auckland’s wet climate.

Design Tip: Use online tools like RoomSketcher to mock up your layout, ensuring your design maximizes space and meets both your aesthetic vision and Auckland’s regulatory requirements.

Choosing the right design and layout creates a bathroom that’s both beautiful and practical, tailored to your Auckland home’s unique characteristics and NZ standards.

Step 3: Select Materials and Fixtures

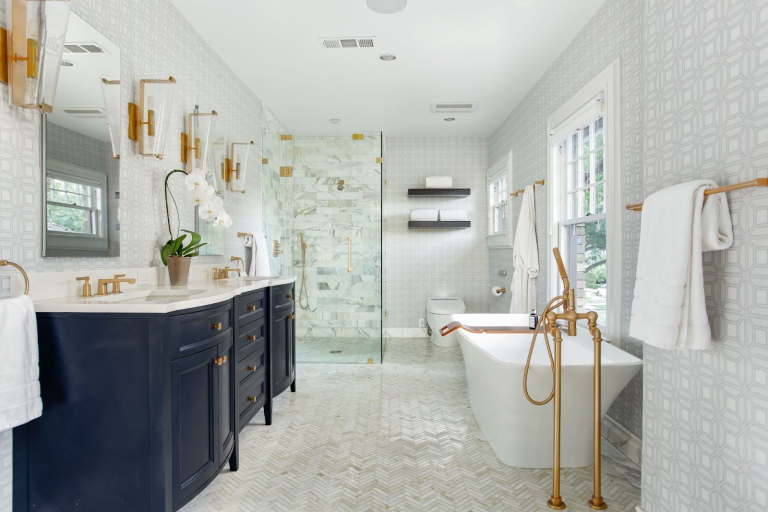
The materials and fixtures you choose will determine your bathroom’s durability, style, and functionality. In Auckland, where humidity and coastal conditions can affect longevity, selecting the right products is crucial.

  • Tiles, flooring, vinities, tapware:
    • Choose porcelain or stone tiles for walls and floors—like travertine or slate from Tile Space in Newmarket—starting at $60/sqm, offering durability and a luxe look for Remuera bathrooms.
    • Opt for large-format tiles (600 mm x 600 mm) to make small spaces, like those in Mount Eden apartments, feel bigger, with fewer grout lines for easier cleaning, per 2024 design trends.
    • Select a vanity with storage, such as the Mondella Resonance from Bunnings in Manukau ($500–$800), ensuring a sleek look with practicality for busy Papatoetoe households.
    • Pick modern tapware, like Methven’s black Aio Aurajet showerhead, available at Plumbing World in Albany, adding a stylish touch while meeting NZ water efficiency standards.
  • Choose water-efficient, NZ-certified fixtures:
    • Use WELS-rated fixtures (Water Efficiency Labelling Scheme)—a 4-star showerhead, like Methven’s, uses 7.5 L/min, aligning with Auckland Council’s water conservation goals, per NZ Building Code Clause G12.
    • Install a dual-flush toilet, such as the Caroma Profile 5 from Mitre 10 ($600), which uses 3–4.5 L per flush, reducing water usage, a smart choice for North Shore’s eco-conscious homes.
    • Ensure fixtures are NZ-certified to meet AS/NZS 3718 standards, guaranteeing safety and performance, especially for tapware exposed to Auckland’s salty air, per NZS 3500.3 (Plumbing and Drainage).
  • Consider durability and ease of maintenance:
    • Opt for materials that withstand Auckland’s humidity—porcelain tiles and powder-coated tapware resist moisture and corrosion, ideal for coastal St Heliers bathrooms, per manufacturer durability claims.
    • Choose low-maintenance finishes, like matte tiles or engineered stone vanities, which resist staining and are easy to clean, a practical solution for busy families in Titirangi, per local renovation feedback.
    • Avoid high-maintenance materials like unsealed timber, which can warp in Auckland’s wet climate, leading to costly repairs, per NZ Building Code Clause E3 (Internal Moisture).

Material Tip: Visit showrooms like Tile Space or Plumbing World to see products in person—touching tiles and testing tapware ensures you’re happy with your choices before committing.

Selecting durable, water-efficient materials and fixtures ensures your bathroom looks great and performs well, meeting both your style preferences and Auckland’s environmental conditions.

Step 4: Hire Qualified Contractors

A bathroom renovation involves complex tasks that require expertise to ensure safety, compliance, and quality. In Auckland, hiring qualified contractors is essential for a successful remodel, especially for code-heavy work.

  • Why licensed builders/plumbers are essential in NZ:
    • Licensed Building Practitioners (LBPs) and plumbers ensure your renovation meets NZ Building Code standards, like Clause G1 (Personal Hygiene), avoiding fines or rework, a must in regulated areas like Parnell.
    • Professionals handle complex tasks—like waterproofing or electrical work—reducing risks like leaks or short circuits, which can be costly in Auckland’s humid climate, per WorkSafe NZ guidelines.
    • In Auckland, where older homes in Mount Eden often have outdated plumbing, licensed plumbers can address issues like low water pressure or corroded pipes, ensuring a reliable system, per NZS 3500.3.
  • How My Homes Construct ensures code compliance and quality:
    • My Homes Construct Ltd employs certified LBPs and plumbers, guaranteeing your renovation complies with Auckland Council regulations, from structural changes to waterproofing, per the Building Act 2004.
    • They use high-quality materials and follow a strict quality control process, ensuring your bathroom withstands Auckland’s wet, salty air, especially in coastal areas like St Heliers, per NZ Building Code Clause E2.
    • With years of experience in Auckland renovations, they handle everything from design to handover, delivering a stress-free remodel that meets your vision, as seen in their projects across Remuera and Papatoetoe.

Contractor Tip: Always check your contractor’s LBP certification on the MBIE website—it confirms their qualifications and ensures your project meets NZ standards, giving you peace of mind.

Hiring qualified contractors like My Homes Construct Ltd ensures your bathroom renovation is safe, compliant, and built to last, tailored to Auckland’s unique challenges.

Step 5: Demolition & Prep Work

Demolition and prep work set the stage for your new bathroom, clearing out the old to make way for the new. In Auckland, proper planning during this phase minimizes disruptions and ensures a smooth renovation.

  • What to expect during demolition:
    • Demolition involves removing old tiles, fixtures, and cabinetry—expect noise, dust, and debris, especially in older Mount Eden homes with tiled-over plaster walls, which can take 1–2 days, per local builders.
    • Professionals will isolate the area with plastic sheeting to contain dust, protecting the rest of your home, a key consideration for apartments in the CBD with shared spaces, per WorkSafe NZ guidelines.
    • Plumbing and electrical systems may be temporarily disconnected—ensure you have access to another bathroom during this phase, which can last 2–3 days, depending on the project scope.
  • Proper disposal and managing disruptions:
    • Hire a skip bin for debris—4 cubic metres, costing $300–$400 from Auckland’s Bin Hire, is enough for a standard bathroom reno, ensuring proper disposal of tiles, plaster, and fixtures.
    • Schedule demolition during quieter times, like weekdays, to minimize disruption for neighbours, especially in close-knit Papatoetoe communities, per Auckland Council noise regulations.
    • Communicate with your contractor about timelines—My Homes Construct Ltd ensures minimal downtime, coordinating trades to keep the project on track, even in busy North Shore homes.
  • Prep work for the next phase:
    • After demolition, the space is prepped—walls are checked for mould or damage, common in Titirangi’s humid settings, and repaired to ensure a solid foundation, per NZ Building Code Clause E3.
    • The floor is levelled, and plumbing or electrical rough-ins are marked out, ensuring the new layout aligns with your design, a critical step for seamless installation, per Clause G1.
    • Temporary protective coverings are added to floors and walls, preventing damage during the next stages, a standard practice for professionals like My Homes Construct Ltd in Auckland renovations.

Prep Tip: Take photos before demolition starts—it’s helpful for insurance purposes and ensures you have a record of existing plumbing or electrical setups, especially in older homes.

Proper demolition and prep work ensure your bathroom renovation starts on the right foot, minimizing issues and setting up Auckland homeowners for a successful remodel.

Step 6: Plumbing, Electrical & Waterproofing

Plumbing, electrical, and waterproofing are the backbone of your bathroom renovation, ensuring functionality, safety, and compliance with NZ standards. In Auckland, these steps require professional expertise due to the city’s climate and regulations.

  • Code-compliant installations:
    • Plumbing involves installing new pipes for showers, toilets, and vanities—licensed plumbers ensure compliance with NZ Building Code Clause G1, preventing leaks, a common issue in older Mount Eden homes.
    • Electrical work, like adding underfloor heating or new lighting, must meet Clause F5 (Construction and Demolition Hazards)—professionals wire circuits to handle Auckland’s high humidity, per AS/NZS 3000 standards.
    • Both trades require sign-off for council inspections, ensuring your renovation passes compliance checks, a must in regulated areas like Parnell, per the Building Act 2004.
  • NZ waterproofing standards for wet areas:
    • Waterproofing is mandatory for wet areas—membranes, like those from Mapei, are applied to floors and walls, ensuring a 1:100 fall to drains, per NZ Building Code Clause E3 (Internal Moisture).
    • In Auckland, where rainfall averages 1200 mm annually, per NIWA, proper waterproofing prevents leaks and mould, especially in coastal St Heliers bathrooms exposed to salty, humid air.
    • Professionals like My Homes Construct Ltd use certified waterproofing systems, ensuring durability and compliance, with a 10-year guarantee, per industry standards, giving you peace of mind.
  • Timeline expectations:
    • Plumbing and electrical rough-ins take 2–4 days, depending on complexity—relocating a toilet in Papatoetoe homes may extend this due to concrete slabs, per local builders’ timelines.
    • Waterproofing takes 2–3 days, including drying time—membranes need 24–48 hours to cure before tiling, a critical step to avoid issues, per manufacturer guidelines.
    • Expect inspections after this phase—Auckland Council may require a site visit to approve plumbing and waterproofing, adding 1–2 days, ensuring compliance before proceeding.

Waterproofing Tip: Test the waterproofing by flooding the area with water before tiling—if it doesn’t drain properly, adjustments are needed to meet Clause E3, preventing future leaks in your Auckland bathroom.

These technical steps are crucial for a functional, long-lasting bathroom, ensuring your Auckland renovation meets both safety standards and environmental challenges.

Step 7: Install Fixtures & Final Touches

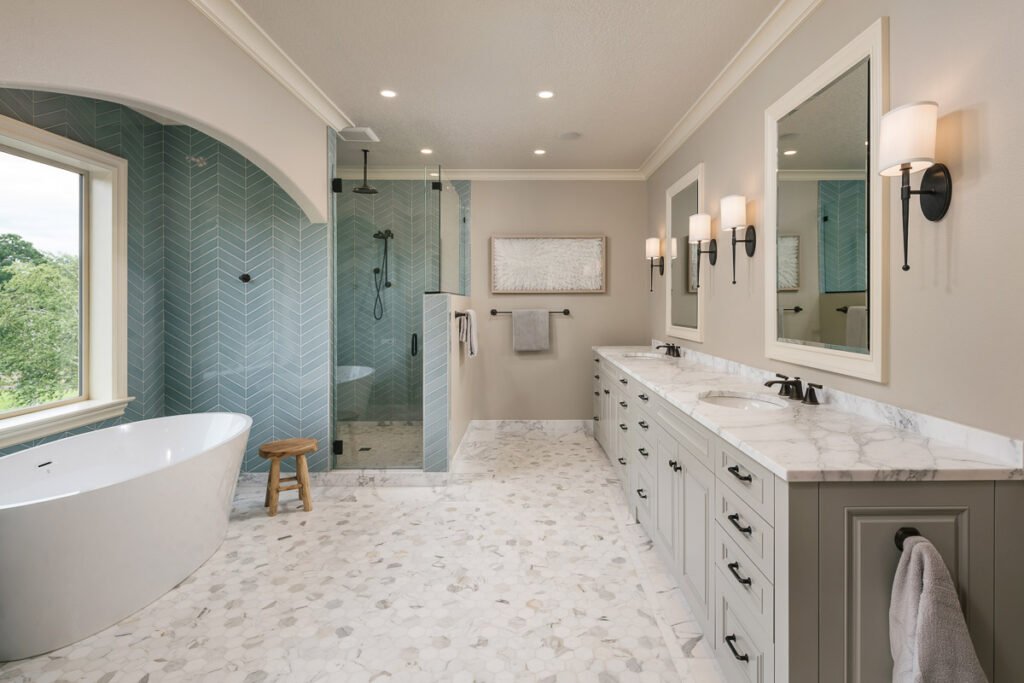
With the technical work complete, it’s time to bring your bathroom to life with fixtures, fittings, and finishing touches. This stage transforms your space into a stylish, functional area for your Auckland home.

  • Fitting sinks, bathtubs, mirrors, etc.:
    • Install your vanity, sink, and tapware—professionals ensure secure fittings, like a Methven Aio tap, preventing leaks, a key concern in North Shore’s humid bathrooms, per NZ Building Code Clause G1.
    • Fit the bathtub or shower—freestanding tubs, like the Englefield Siena from Plumbing World ($1,500), add a luxe touch to Remuera renovations, while walk-in showers suit Titirangi’s modern homes.
    • Mount mirrors and accessories—a large, frameless mirror above the vanity, like those from Mitre 10 ($200), makes small Mount Eden bathrooms feel bigger, enhancing both style and functionality.
  • Paint, lighting, ventilation setup:
    • Paint walls with a moisture-resistant finish, like Resene Bathroom Paint in Alabaster, available at Resene ColorShops in Parnell ($80/4L), ensuring durability in Auckland’s wet climate, per Clause E3.
    • Install lighting—dimmable LED sconces from Lighting Plus in Albany ($80) create a warm ambiance, while an exhaust fan (25 L/s) ensures ventilation, meeting Clause G4, a must for Papatoetoe bathrooms.
    • Add finishing touches like towel racks and hooks—Satinjet heated racks from Mitre 10 ($300) keep towels dry, a practical feature for Auckland’s humid summers, enhancing comfort and style.
  • Quality control checks:
    • Professionals like My Homes Construct Ltd conduct thorough checks—testing taps, showers, and drains for leaks, ensuring all fixtures function perfectly, per Clause G1 standards.
    • They inspect tiling for even grout lines and secure fittings, addressing any issues before handover, a standard practice in St Heliers renovations, ensuring a polished, high-quality finish.
    • Check lighting and ventilation systems to confirm they meet your design goals, ensuring the space is both beautiful and practical, ready for daily use in your Auckland home.

Finishing Tip: Add a personal touch with accessories like a woven bath mat or a small plant, bringing warmth and personality to your new bathroom, perfect for a cozy Parnell space.

This stage brings your vision to life, creating a bathroom that’s both stunning and functional, tailored to your Auckland lifestyle with professional precision.

Step 8: Clean-Up & Handover

The final step of your bathroom renovation ensures the space is spotless, functional, and ready for use. In Auckland, a thorough clean-up and handover process guarantees a seamless transition to enjoying your new bathroom.

  • Post-reno inspection:
    • Your contractor will conduct a final inspection, checking for any missed issues—like grout imperfections or loose fittings—ensuring the bathroom meets your expectations, a standard step for My Homes Construct Ltd.
    • Test all systems—run the shower, flush the toilet, and check the exhaust fan to confirm everything works, meeting NZ Building Code Clauses G1 and G4, a must for compliance in Parnell homes.
    • Inspect waterproofing seals and electrical fittings, ensuring no leaks or hazards, a critical step in Auckland’s humid climate, per Clause E3, guaranteeing long-term durability.
  • What warranties or aftercare My Homes Construct provides:
    • My Homes Construct Ltd offers a 10-year waterproofing guarantee, covering any issues with membranes or seals, giving you peace of mind, a common industry standard for Auckland renovations.
    • They provide a 2-year workmanship warranty, addressing any defects in installation, such as loose tiles or fittings, ensuring your bathroom remains flawless, per their service commitment.
    • Aftercare includes maintenance tips—like cleaning grout with a vinegar solution to prevent mould in Titirangi’s humid settings—helping you keep your bathroom in top condition, per Clause E3.
  • Client walkthrough:
    • You’ll do a final walkthrough with your contractor, reviewing every detail—from tap functionality to lighting ambiance—ensuring the space matches your vision, a key step in Remuera renovations.
    • My Homes Construct Ltd explains how to use new features, like underfloor heating or a dual-flush toilet, ensuring you’re confident with your new bathroom, tailored for North Shore homes.
    • They’ll provide a handover pack, including warranties, product manuals, and council sign-offs, ensuring all documentation is in order, a professional touch for Auckland homeowners.

Handover Tip: Take photos during the walkthrough to document the finished space—it’s useful for insurance purposes and helps you track any future maintenance needs in your Auckland bathroom.

A thorough clean-up and handover ensure your bathroom is ready to enjoy, with the support of My Homes Construct Ltd’s warranties and aftercare, making your renovation a success.

FAQs About Bathroom Renovations in Auckland

bathroom renovation in auckland NZ

How long does a bathroom renovation take in Auckland?
A standard bathroom renovation takes 4–6 weeks, depending on complexity. Demolition and prep take 3–5 days, plumbing and waterproofing 5–7 days, and installation 1–2 weeks, per local builders’ timelines.

Do I need a building consent for a bathroom remodel in NZ?
Yes, if your remodel involves structural changes, moving plumbing, or altering waterproofing, per the Building Act 2004. Minor cosmetic updates, like painting or new tapware, typically don’t require consent in Auckland.

Can I renovate my bathroom in winter?
Yes, but Auckland’s winter rain (150 mm/month, per NIWA) can delay outdoor work like waste removal. Indoor tasks like tiling and fitting are unaffected—schedule with professionals like My Homes Construct Ltd to minimize disruptions.

What’s the best way to save on a bathroom renovation?
Focus on essentials like waterproofing and plumbing, choose mid-range fixtures, and do DIY tasks like painting. My Homes Construct Ltd can help you balance quality and budget for your Auckland remodel.

How do I choose a contractor in Auckland?
Hire a Licensed Building Practitioner (LBP)—check their certification on the MBIE website. My Homes Construct Ltd offers certified expertise, ensuring compliance and quality for your bathroom renovation.

Conclusion

A great bathroom renovation adds comfort, value, and style to your Auckland home—and with the right team, it’s stress-free and rewarding. This step-by-step guide has walked you through the process, from planning your goals and choosing a design to selecting materials, hiring contractors, and completing the final touches. Whether you’re tackling a small upgrade in Papatoetoe or a full remodel in Remuera, each step ensures your new bathroom meets your needs, enhances your lifestyle, and complies with NZ regulations. Auckland’s unique challenges—like humidity, older plumbing, and strict building codes—require expertise to get it right. My Homes Construct Ltd brings years of experience, certified professionals, and a commitment to quality, ensuring every detail counts, from concept to handover.

🛠️ Get Bathroom Renovation Help in Auckland
📞 Call the Experts at My Homes Construct: 022 315 8987
📧 Email: info@myhomesconstruct.co.nz
🌐 Website: https://myhomesconstruct.co.nz
From concept to completion—trust Auckland’s renovation pros to get it done right!

Ready to transform your bathroom? Contact My Homes Construct Ltd today for a free consultation and start your journey to a stunning, functional space!