Gutters are your home’s first line of defense against rainwater, but without properly connected downspouts, that defense falls apart. Downspouts channel water away from your foundation, preventing costly issues like basement flooding, soil erosion, and structural damage. Whether you’re a homeowner aiming to spruce up your drainage system, a DIY enthusiast eager to tackle a new project, or a contractor refining your skills, this comprehensive guide will equip you with everything you need to connect gutter downspouts securely and efficiently.
Overview
In this 3,000+ word guide, we’ll cover why downspout connections matter, provide a detailed step-by-step process, share expert tips, highlight common pitfalls, and even tell you when it’s time to call in the pros. Let’s dive in and ensure your home stays dry and damage-free.
Why Proper Downspout Connection Matters
Before we grab the tools, let’s understand the stakes. A gutter system without well-connected downspouts is like a car without tires—functional in theory, but useless in practice. Here’s why getting this right is non-negotiable:
Preventing Basement Flooding
When downspouts fail to direct water away from your home, it pools near the foundation. Over time, this water seeps into your basement, causing mold, mildew, and structural weakening. A single heavy rain can turn a minor oversight into a major repair bill.
Stopping Soil Erosion
Uncontrolled runoff erodes the soil around your home, destabilizing landscaping and exposing your foundation to further damage. Properly installed downspouts guide water to safe dispersal points, preserving your yard and property.
Extending Gutter Lifespan
Leaks, overflow, and loose connections stress your gutter system. By ensuring downspouts are securely attached and watertight, you reduce wear and tear, saving money on premature replacements.
Enhancing Property Value
A functional drainage system isn’t just practical—it’s a selling point. Potential buyers notice well-maintained gutters, and a leak-free downspout setup signals a home that’s been cared for.
With these benefits in mind, let’s move on to the hands-on part: connecting your gutter downspouts like a pro.
Step-by-Step Guide: How to Connect Gutter Downspouts
This detailed walkthrough will guide you through every stage of the process. We’ll break it into seven actionable steps, ensuring clarity and precision so you can tackle the job with confidence.
Step 1: Gather the Necessary Tools & Materials
Preparation is half the battle. Here’s what you’ll need to connect your gutter downspouts effectively:
- Hacksaw or Tin Snips: These tools cut through aluminum or vinyl downspouts with ease. A hacksaw offers precision, while tin snips are great for quick, clean cuts.
- Drill and Rivets/Screws: A cordless drill paired with sheet metal screws or pop rivets secures connections. Rivets are permanent; screws allow for adjustments.
- Silicone Sealant or Gutter Caulk: This waterproofs joints, preventing leaks. Silicone is flexible and durable; gutter caulk is designed specifically for outdoor use.
- Downspout Elbow Connectors: These redirect water flow around corners or away from the house. Get 45° or 90° elbows depending on your setup.
- Measuring Tape: Accuracy matters—measure twice, cut once.
- Safety Gear: A sturdy ladder, work gloves, and safety glasses protect you from sharp edges and heights.
- File or Sandpaper: Smooths rough edges after cutting.
- Level: Ensures your downspout runs straight.
- Marker: Marks cutting lines clearly.
- Aluminum Downspouts: Lightweight, rust-resistant, and widely available.
- Vinyl Downspouts: Affordable, easy to work with, and corrosion-proof.
Stock up at your local hardware store, and you’re ready to roll.
Step 2: Measure & Cut the Downspout
Precision in measuring and cutting sets the stage for a seamless fit. Here’s how to do it:
- Determine the Length: Measure from the gutter outlet (the hole at the bottom of your gutter) to where the downspout will end—typically near the ground or where an extension begins. Add a few extra inches if you’re attaching an elbow.
- Mark the Pipe: Use a marker to draw a straight line across the downspout at your measured length. Double-check the measurement to avoid waste.
- Cut Carefully: Clamp the downspout to a stable surface (like a workbench) and use a hacksaw or tin snips to cut along the line. Keep the blade steady for a clean edge.
- Smooth the Edges: File or sand down any burrs or jagged spots. Rough edges can snag on connectors or cause leaks.
If your downspout comes in pre-cut lengths (e.g., 10 feet), you may need to trim multiple sections and connect them with couplers. Plan ahead to minimize seams.
Step 3: Attach the Downspout to the Gutter Outlet
Now, let’s connect the downspout to your gutter system:
- Fit the Downspout: Slide the top end of the cut downspout into the gutter outlet. It should fit snugly—most outlets are designed to accommodate standard 2×3 or 3×4-inch downspouts.
- Secure It: Drill pilot holes through the overlapping sections, then fasten with sheet metal screws (two or three per side) or rivets. Screws are easier to remove later; rivets offer a stronger hold.
- Seal the Joint: Apply a generous bead of silicone sealant or gutter caulk around the connection where the downspout meets the outlet. Smooth it with a gloved finger for a watertight seal.
- If the fit is loose, crimp the downspout’s edges slightly with pliers.
- If the outlet is damaged, replace it with a new gutter outlet drop before proceeding.
This joint is the backbone of your setup—make it solid.
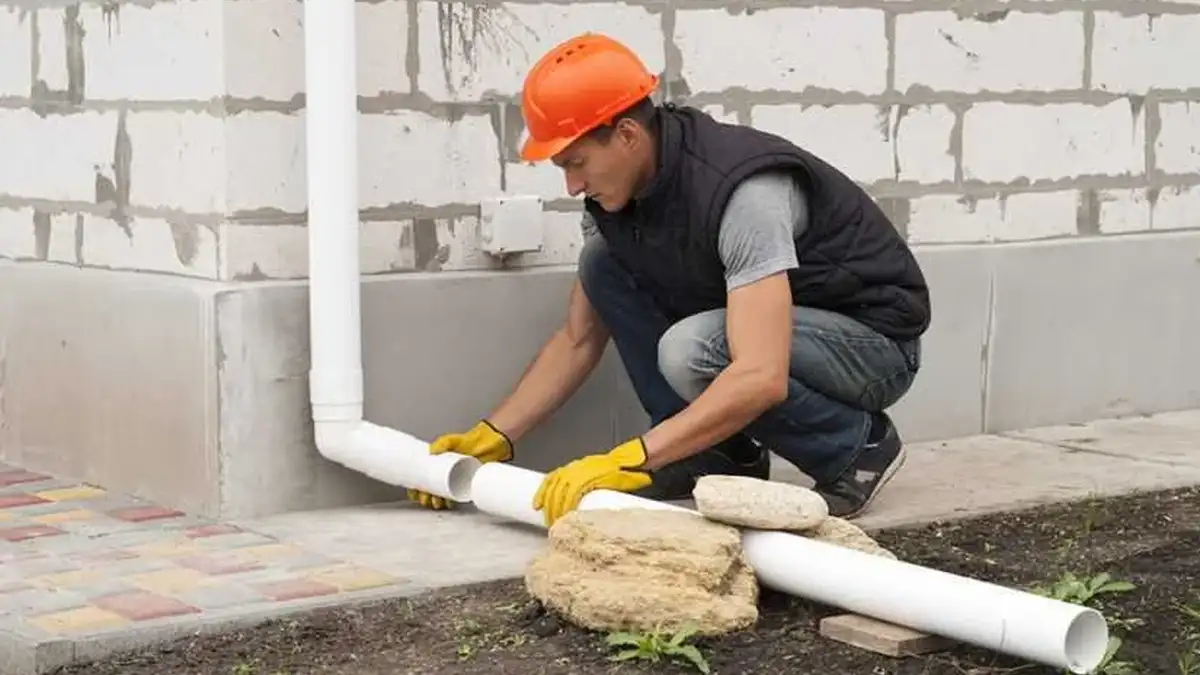
Step 4: Install Elbows for Proper Water Flow
Elbows are essential for directing water where it needs to go. Here’s how to install them:
- Assess the Path: Decide where water should exit—away from the house, toward a drainage area, or into an extension. Most homes need one elbow at the top (to angle the downspout downward) and sometimes one at the bottom (to redirect flow).
- Attach the First Elbow: Slide a downspout elbow connector onto the bottom of the attached downspout section. Align it to point downward or outward as needed.
- Secure It: Drill and fasten with screws or rivets—two per elbow is standard. Apply sealant around the joint.
- Add a Second Elbow (If Needed): For longer runs or to avoid obstacles (like a porch), attach another elbow lower down. Connect it to an additional downspout segment if required.
- Use 45° elbows for gentle bends or 90° elbows for sharp turns.
- Ensure the elbow directs water at least 5–10 feet from the foundation.
A well-placed elbow keeps water flowing smoothly without backups.
Step 5: Secure the Downspout to the Wall
A loose downspout flops around in the wind and risks disconnecting. Anchor it properly:
- Position the Straps: Use downspout straps (metal or plastic bands) to hold the pipe against the wall. Place one every 3–4 feet, starting near the top.
- Mark and Drill: Hold the strap in place, mark the screw holes, and drill pilot holes into the wall (use masonry bits for brick or concrete).
- Fasten Securely: Attach the strap around the downspout and screw it into the wall. Tighten until snug, but don’t crush the pipe—over-tightening can dent aluminum or crack vinyl.
- Keep the downspout plumb (vertically straight) using a level.
- Avoid placing straps over joints or elbows—they’re harder to adjust there.
This step ensures your downspout stays put through storms and seasons.
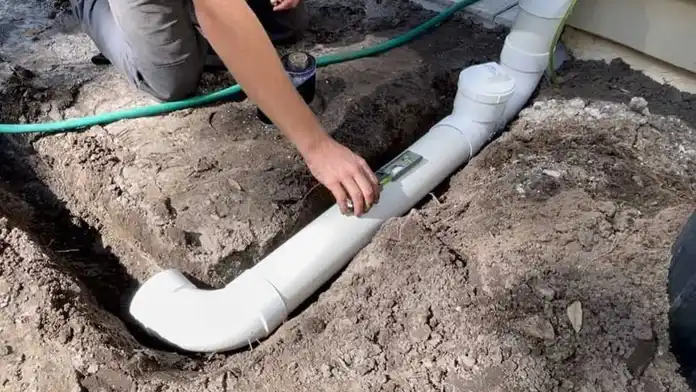
Step 6: Add Extensions or Splash Blocks
The final touch is directing water away from your home’s base:
- Install a Gutter Extension: Slide a downspout extension (a straight pipe segment) onto the bottom elbow or downspout end. Secure it with screws or a clip. Aim for 5–10 feet of distance from the foundation.
- Place a Splash Block: Alternatively, set a splash block (concrete or plastic) under the downspout’s end. Angle it to disperse water away from the house and prevent soil washout.
- Check Alignment: Ensure the extension or block slopes slightly downward for efficient drainage.
Connect the extension to a rain barrel to collect runoff for gardening. Add an overflow valve to manage excess water.
This step protects your foundation and yard from water damage.
Step 7: Test the Connection
No job’s complete without a test run:
- Run Water Through: Use a hose to pour water into the gutter or wait for rain. Start with a light flow, then increase to simulate a downpour.
- Inspect Joints: Check every connection—gutter outlet, elbows, straps—for leaks, drips, or loose spots.
- Verify Drainage: Confirm water exits the downspout and flows away from the house as intended.
- Fix Issues: Tighten screws, add more sealant, or adjust alignments as needed.
- Pooling water near the base means your extension isn’t long enough.
- Leaks at joints suggest insufficient sealing or loose fasteners.
A successful test confirms your downspout is ready for anything nature throws at it.
Pro Tips for a Leak-Free Gutter Downspout Connection
Take your installation to the next level with these expert-recommended tricks:
- Choose Durable Materials: Aluminum downspouts resist rust and last decades; vinyl downspouts are budget-friendly and low-maintenance.
- Seal Liberally: Apply silicone sealant or gutter caulk to every joint, even if it seems tight—water finds the smallest gaps.
- Add a Rain Barrel: Capture runoff for sustainable water use. Look for models with screens to keep debris out.
- Maintain Regularly: Clear leaves, twigs, and dirt from gutters and downspouts at least twice a year—clogs undo all your hard work.
- Slope Extensions: Angle extensions downward (1/4 inch per foot) to speed up water flow and prevent stagnation.
These tweaks ensure longevity and performance.
Common Mistakes to Avoid
Even seasoned DIYers slip up. Steer clear of these pitfalls:
- Misaligned Elbows: Poor angles cause water to back up or spill. Use a level to keep bends precise.
- Skipping Sealant: Unsealed joints leak over time, especially under pressure from heavy rain.
- Over-Tightening Screws: Too much force dents aluminum or cracks vinyl, weakening the structure.
- Short Extensions: Water dumping too close to the house defeats the purpose—aim for at least 5 feet of clearance.
- Ignoring Debris: Failing to clean gutters before installation leads to clogs and overflow.
Slow down, double-check, and you’ll avoid headaches later.
When to Call a Professional
DIY is rewarding, but some jobs need a pro’s touch. Call for help if:
- Downspouts Are Damaged: Cracked, rusted, or heavily clogged pipes may need full replacement.
- Drainage Is Complex: Multi-story homes or intricate layouts require custom solutions.
- Gutters Need Overhaul: If the whole system’s failing, pros can redesign it for optimal flow.
For top-notch gutter services in Auckland, reach out to My Homes Construct Ltd at 022 315 8987. They offer expert installation, repairs, and free quotes tailored to your needs.
Additional Considerations for Gutter Downspout Success
Let’s round out this guide with extra insights to make your project bulletproof.
Choosing the Right Downspout Size
Standard sizes are 2×3 inches (for smaller roofs) and 3×4 inches (for larger roofs). Measure your gutter’s capacity—downspouts should handle at least 25% of the gutter’s water flow. When in doubt, go bigger to avoid overflow.
Seasonal Prep
- Spring: Check for winter damage and clear debris.
- Fall: Remove leaves before heavy rains hit.
- Winter: Ensure downspouts are free of ice blockages.
Cost Breakdown
- Downspout Pipe: $5–$10 per 10-foot section.
- Elbows: $3–$5 each.
- Straps: $1–$2 each.
- Sealant: $5–$10 per tube.
- Tools: $50–$100 if buying new.
Total DIY cost: $20–$50 per downspout, versus $100+ for professional work.
Conclusion
Connecting gutter downspouts isn’t just a chore—it’s an investment in your home’s future. With a hacksaw, screws, sealant, and a little elbow grease, you can create a drainage system that keeps water damage at bay. Follow this guide’s seven steps, test your work thoroughly, and enjoy the satisfaction of a leak-free setup. Need expert help? My Homes Construct Ltd is Auckland’s go-to for gutter installation and repairs. Call 022 315 8987 for a free quote and professional service you can trust. Your home deserves the best—get started today!
Gutter Help Across Auckland
If this guide raised a question about your own home, the My Homes Construct Ltd team is here to help. We provide professional gutter cleaning, repair and replacement services right across Auckland — North Shore, West Auckland, Central Auckland, East Auckland and South Auckland — along with the surrounding suburbs.
Every enquiry starts with free, no-obligation advice and a written quote. We're a registered building company and back our work with a workmanship warranty as per your quotation, so you can move forward with confidence.
When to Call a Professional
The trickiest part of any gutter cleaning, repair and replacement project is often knowing when to stop and call someone in. Warning signs worth taking seriously include recurring problems, damage that keeps spreading, anything involving safety or access at height, and work that touches the structure of your home.
In those situations a professional opinion pays for itself. We're always happy to take a look and tell you straight whether it's something you can manage yourself or a job better left to a registered building company — with no obligation either way.
A Quick Checklist for Auckland Homeowners
Whatever you decide to do next, a few simple principles will save you money and stress on any gutter cleaning, repair and replacement job in Auckland. Act early — Auckland's wet, humid climate turns small problems into expensive ones faster than most people expect. Get it in writing — a clear, itemised written quote protects you and makes comparing options straightforward. Check it's a registered building company — it matters for quality, consent and warranty cover. Ask about the warranty — reputable Auckland tradespeople stand behind their workmanship, not just the materials. Think long-term value, not just the cheapest price — the lowest quote is rarely the best value once durability is factored in.
Keep these in mind and you'll avoid the most common — and most costly — mistakes we see on Auckland properties.
Need Professional Help in Auckland?
My Homes Construct Ltd provides expert gutter and full home-improvement services across all Auckland suburbs. Get a free, no-obligation quote today.