
Exterior Paint Preparation: How to Prepare a House for Painting in NZ
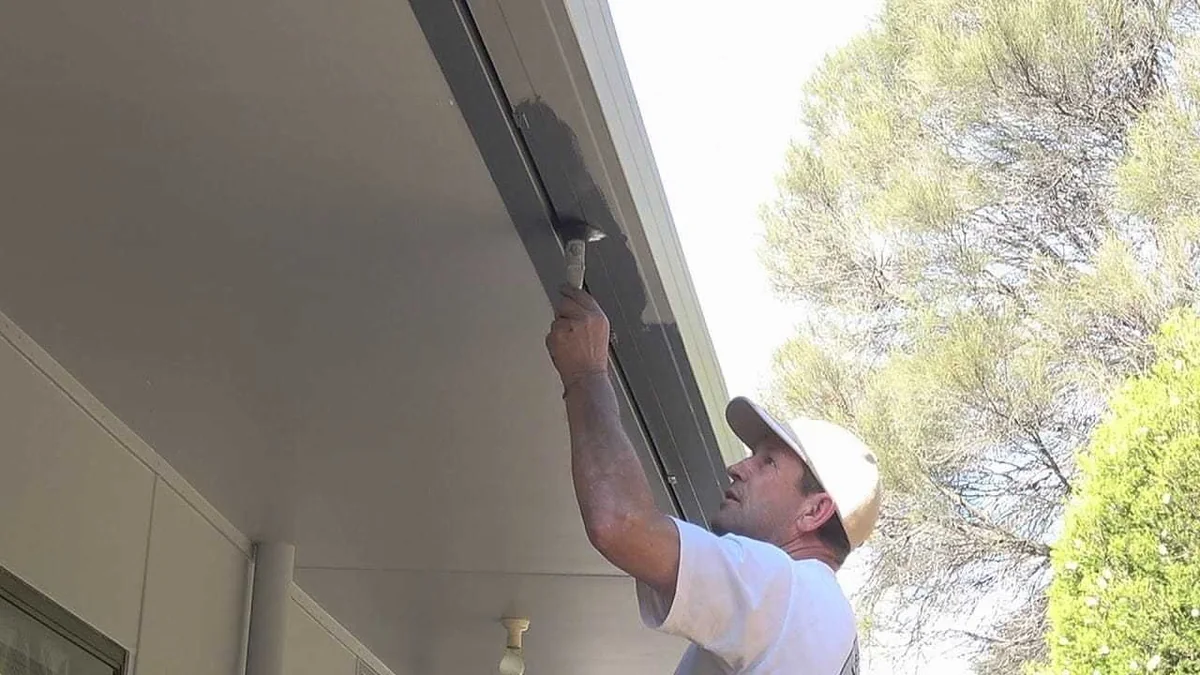
Quick answer: Exterior paint preparation means testing the old paint, washing the surface, removing loose or failed coating, repairing damage, sanding and priming any bare areas before topcoats go on. The life of a paint finish depends on good preparation and a quality paint system. Preparation is usually the longest and most valuable part of an exterior paint job.
This guide gives the preparation steps in order, explains why water-blasting is a poor idea on many surfaces and covers lead paint safety.
What does exterior paint preparation involve?
Exterior paint preparation involves cleaning, repairing and priming the surface so the new coating has something sound to grip.
BRANZ lists the elements of good preparation as removing dirt, chalking, moss and mould, removing all poorly adhered paint, sanding rough edges and existing defects, rinsing off the dust, priming raw substrate, and checking that windows and doors will not stick after repainting. It also says the life of a paint finish depends on good preparation and the application of a quality paint system, which is why the preparation stage is often the largest line in an honest quote.
For plaster-clad homes, see painting plaster cladding, and when the old paint has already failed, peeling exterior paint.
How do you test whether the old paint is still sound?
You test old paint with a simple adhesion test, using adhesive tape pressed onto a clean section of paint.
- Choose a clean area. Pick a section of paint on a sheltered and an exposed elevation.
- Press tape firmly over the paint. For a better test, score a cross-pattern with a sharp knife first.
- Pull the tape away. Look at what comes with it.
- Read the result. If paint flakes come off with the tape, that paint should be removed. If failure is in small areas only, clean and sand those areas, prime raw surfaces and repaint.
BRANZ also says to check for chalking by rubbing a finger over the paint. A white residue means it is due for repainting. See BRANZ Bulletin 633.
How do you prepare a house exterior for painting, step by step?
Preparation follows a fixed order so that each stage does not undo the last.
- Wash the surface. Remove mould, chalk, salt and grime with a brush and detergent, then rinse.
- Scrape loose and flaking paint. Take back to sound paint and feather the edges.
- Repair damage. Replace or repair rotten boards, re-fix loose ones, and fill nail holes and cracks.
- Sand. Remove rough edges and defects so they do not show through the new coat.
- Rinse or wipe off dust. Sanding dust left behind stops paint bonding.
- Prime bare areas. Apply a primer to exposed wood or raw substrate straight after sanding.
- Seal joints that move. Use a suitable flexible sealant at moving joints.
- Apply topcoats. Two full coats over a prepared and primed surface.
Washing also reveals what the surface is really like, which is why most repair items on an exterior job are found during the wash. Our exterior painting service follows this order.
Why should weatherboards not be water-blasted?
Weatherboards should not be water-blasted because the pressure can drive water through the gaps between boards and around window sashes.
BRANZ says waterblasting is not a recommended paint removal method and must not be used on weatherboards, on modified cement plastered finishes, where it can damage the finish coat, or on soft claddings such as acrylic plaster, which it erodes. It can be used to remove loose or flaking paint from hard surfaces such as profiled metal, concrete and brick. Washing by hand or with low pressure is the safer approach on most house walls.
Do you need to strip all the old paint before repainting?
No. Modern paints do not continue to harden and become brittle, so existing paint does not need to be stripped unless its condition requires it.
BRANZ explains that older oil-based paints did harden with age and had to be removed from time to time. The exception is older weatherboards and trims that were preprimed, because early quick-drying primers continue to harden. In some situations the existing paint on those boards may need to be removed. A sound, well-adhered coating that has been washed and sanded is a perfectly good base for the new system.
What should you know about lead paint before sanding or scraping?
If your house was built in the 1980s or earlier, presume the old paint may contain lead and take precautions before you scrape or sand.
WorkSafe says buildings from the 1980s or earlier should be presumed to have been painted with lead-based paint. Health NZ warns that lead can sit under newer coats and that you cannot tell by appearance. Avoid dry sanding, water blasting and open flame on suspect paint, use wet methods and dust collection, and keep children and pets away. Read WorkSafe’s lead-based paint guidance and Health NZ’s safe removal advice before you start.
Does preparing a two-storey house need scaffolding?
A two-storey exterior often needs scaffolding for preparation, because scraping and sanding is slower and more physical than rolling on paint.
Working at height safely on a repaint usually requires a stable platform, and a quote for a two-storey exterior with no access allowance is either using someone else’s scaffold or cutting corners. See WorkSafe’s working at height guidance for why ladders alone are rarely the right answer on larger jobs.
What mistakes ruin exterior preparation?
A handful of shortcuts cause most early paint failures, and each is invisible on handover day.
- Painting over dirt or chalk. The new coat bonds to the dirt, not the wall.
- Skipping the repair stage. Painting over rot seals moisture in rather than out.
- Leaving sanding dust. Dust left on the surface stops paint bonding.
- Not priming bare areas. Patchy sheen and early flaking show up on exactly those spots.
- Rushing the weather. Coating damp or dewy surfaces causes blistering and peeling.
How long does preparation take, and what does it cost?
Preparation usually takes longer than coating, and it is usually the largest single line in an honest exterior quote.
A house needing significant repair work will spend more days looking untouched than painted, and weather windows add to the elapsed time. That is why quotes that look cheap often allow for a wash and two coats over whatever is there. Our exterior painting cost guide shows how preparation affects price, and the weatherboard painting guide covers repairs specific to timber.
Timing is covered in the best time to paint a house exterior.
Sources
These are the primary New Zealand sources behind the facts in this guide.
Conclusion
Good exterior paint preparation is unglamorous and decisive. Test the old paint, wash, repair, sand and prime in order, avoid pressure on weatherboards and plaster, and treat older houses as possibly leaded. Then insist that the quote lists the preparation, not just the coats.
Frequently Asked Questions
Is a pressure washer safe for preparing a house?
Not on weatherboards, modified cement plaster or acrylic plaster, where BRANZ says pressure can drive water through gaps or damage the finish. It can suit hard surfaces such as profiled metal, concrete and brick. Hand washing or low pressure is safer for most house walls.
Do I need primer when repainting?
Not over every square metre, but on every bare, repaired or stained area. Primer makes the topcoat stick and stops the substrate pulling colour or moisture through. Apply it straight after sanding to exposed wood so the surface does not degrade.
How do I know if my old paint has lead in it?
You cannot tell by looking. WorkSafe says to presume lead-based paint in buildings from the 1980s or earlier, and a test kit or a specialist testing company can confirm it. Wet methods and dust control should be used until you know.
Can I paint over mould?
No. Mould has to be killed and removed, and the cause identified, or it will come back through the new coating. In Auckland the cause is usually ventilation or moisture entering from outside, so painting is the last step of the fix, not the whole fix.
Painting Help Across Auckland
Reading up is a smart first step, but every Auckland property is a little different. For advice tailored to your own home, My Homes Construct Ltd offers free assessments and written quotes for interior and exterior painting across all Auckland regions and suburbs.
We respond to enquiries the same business day, explain your options in plain language, and stand behind every job with a workmanship warranty — no pressure and no hidden costs.
When to Call a Professional
The trickiest part of any interior and exterior painting project is often knowing when to stop and call someone in. Warning signs worth taking seriously include recurring problems, damage that keeps spreading, anything involving safety or access at height, and work that touches the structure of your home.
In those situations a professional opinion pays for itself. We're always happy to take a look and tell you straight whether it's something you can manage yourself or a job better left to a registered building company — with no obligation either way.
Timing It Right in Auckland
Auckland's climate runs to its own calendar, and interior and exterior painting projects go more smoothly when they're scheduled with that in mind. Booking weather-dependent work for a settled stretch avoids delays, and getting preventative jobs done before winter saves you from reacting once the heavy rain and coastal winds arrive.
If you're not sure where your property sits on that timeline, that's exactly the kind of thing a free assessment answers. We'll tell you honestly whether something needs attention now or can sensibly wait until the season suits.
A Quick Checklist for Auckland Homeowners
Whatever you decide to do next, a few simple principles will save you money and stress on any interior and exterior painting job in Auckland.
- Act early — Auckland's wet, humid climate turns small problems into expensive ones faster than most people expect.
- Get it in writing — a clear, itemised written quote protects you and makes comparing options straightforward.
- Check it's a registered building company — it matters for quality, consent and warranty cover.
- Ask about the warranty — reputable Auckland tradespeople stand behind their workmanship, not just the materials.
- Think long-term value, not just the cheapest price — the lowest quote is rarely the best value once durability is factored in.
Keep these in mind and you'll avoid the most common — and most costly — mistakes we see on Auckland properties.
Need Professional Help in Auckland?
My Homes Construct Ltd provides expert painting and full home-improvement services across all Auckland suburbs. Get a free, no-obligation quote today.
This guide is published by our Auckland building and renovation company — a registered Auckland building company covering gutters, roofing, renovation, painting, decks and civil construction.