
Fence Build in south auckland
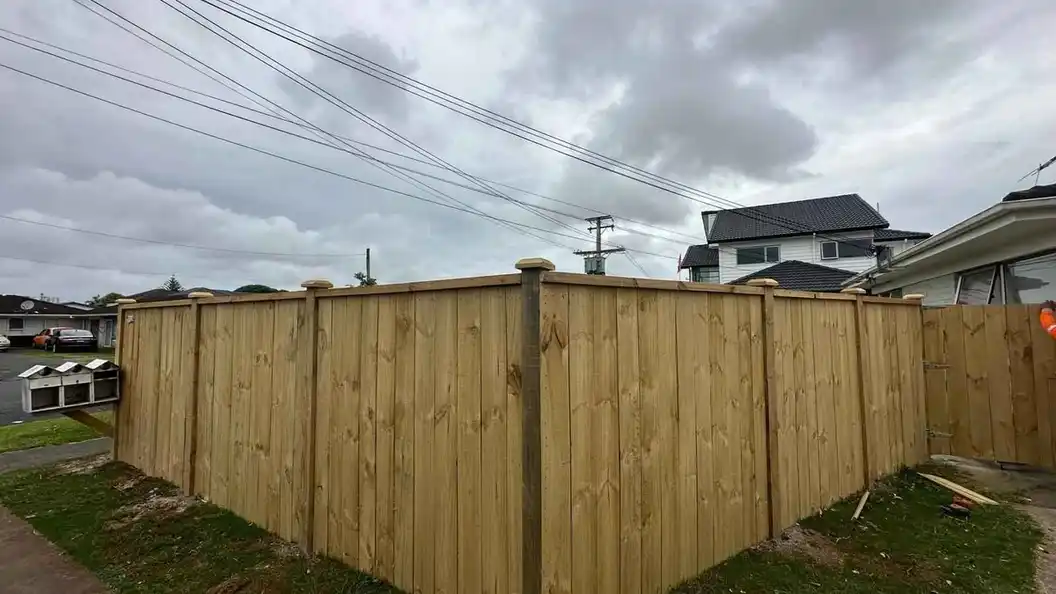
Quick answer: This fence build in South Auckland shows why site preparation matters. The section was overgrown with bushes and weeds, so we advised clearing it first and brought in a digger. We then built a 1.8 metre timber paling fence on 100/100 posts and 100/50 rails, and checked it for stability and alignment before handover.
This is a real My Homes Construct job, and our project came to us through a referral. It walks through each decision on the job, from the first site visit to the final inspection, and ends with the consent and neighbour questions to settle before you build a fence of your own.
How did this fence project start?
The project started with a recommendation: a satisfied client told a friend about our work, and that friend called us about a new fence.
Jobs that come by word of mouth matter to us, because they depend on the last job being done properly. We arranged a site visit quickly to understand what the new client wanted from the fence: privacy, security and a tidy boundary for the property.
The first look at the site changed the plan. The fence line was a jungle of bushes and weeds, and it was clear that a major clean-up was needed before any posts could go in. Our fence building and repair service includes this kind of site check before we quote.
Why did we clear the bushes before building the fence?
We advised clearing the bushes because leaving them would have damaged the new fence over time and made it harder to build straight.
At first the client wanted to keep the bushes. We explained the risk honestly. Plants growing against a fence keep the timber damp, push on palings and posts as they grow, and make it hard to set posts in a straight, stable line. A small step now avoids a costly repair later.
After hearing our concerns, the homeowner agreed with the plan and appreciated the straight advice. We arranged a digger to clear the bushes properly, so the shrubs would not grow back and cause future problems. Once the site was cleared it looked much better, and we were ready to build.
What materials did we use for this fence build in South Auckland?
We used a standard, sturdy timber paling specification, staged on site before construction began so the build could run without delays:
| Component | Size used on this job |
|---|---|
| Posts | 100/100 |
| Rails | 100/50 |
| Palings | 150/25 mm |
| Fence height | 1.8 metres |
Having every material ready and organised is a crucial step. We double-checked the plan against the site and made sure we had all the tools we needed before the first post went in. The right sizes for your fence depend on its height, the soil and how exposed the site is, so we confirm the specification at the site visit rather than guess.
How was the fence built, step by step?
The build followed the order that gives a strong, straight fence, with checks at every stage:
- Stage the materials. Posts, rails and palings were laid out on site so the crew could work without stopping.
- Set the posts. Each post was set firmly into the ground, aligned along the fence line and checked for stability. The posts are the foundation of a strong and durable fence.
- Fix the rails and palings. The rails and palings were attached and checked so everything was secure and level.
- Inspect the finished fence. We checked stability, alignment and overall quality along the whole run.
- Walk it with the client. The homeowner inspected the work with us and gave the job their approval.
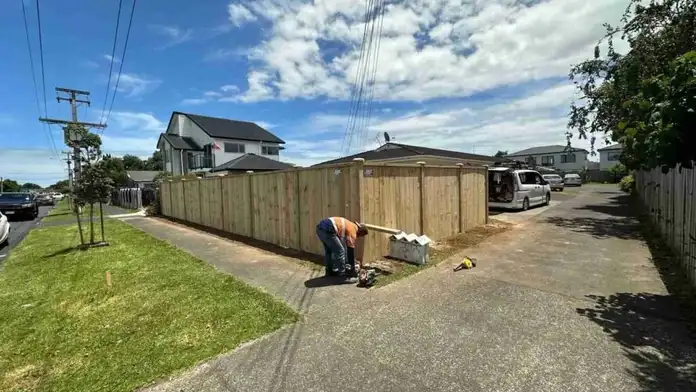
The client was thrilled with the result and appreciated the extra effort that went into clearing the site first. The photo at the top of this page shows the finished fence, with capped posts and a clean corner.
Do you need a building consent for a fence in Auckland?
A building consent is typically needed only for fences over 2.5 metres high; most residential fences are lower and sit within the exemption.
The building.govt.nz guidance on the fences and hoardings exemption, linked below, sets out that limit. A resource consent is a separate question. Depending on the fence location and design, the Auckland Unitary Plan can also apply, so check the Auckland Council fence page before you finalise the height.
Auckland Council also provides an online tool that helps you work out whether your fence project needs a consent. For the most up-to-date rules, it is always best to confirm directly with Auckland Council. Our guide to Auckland fence height and boundary rules explains the main limits in plain language.
Should you talk to your neighbours before building a boundary fence?
Yes. If the fence is on the boundary line, agree the plan with your neighbour, ideally in writing, before you build.
A boundary fence affects both properties, so the height, style, exact position and how the cost is shared are all worth settling first. A short written note of what you agreed avoids misunderstandings later.
If you are not sure where the boundary runs, confirm it from your property records before the posts go in. Moving a finished fence is far harder than checking the line at the start.
What does this job teach about planning a new fence?
The main lesson is that every step counts, from honest advice at the site visit to the final inspection at the end.
Clearing the site added a step, but it gave the posts solid ground and removed the plants that would have pushed against the fence for years. Sound timber sizes, posts set firmly in line and a careful final check do the rest.
Once the fence is up, protect the timber. Our guide to deck and fence maintenance through an Auckland winter covers the simple checks that keep a timber fence sound, and our guide to choosing decking and fencing services in Auckland explains what to ask any builder before you hire them.
Sources and further reading: building.govt.nz: fences and hoardings exemption · Auckland Council: building a fence · building.govt.nz: apply for a building consent
Conclusion
A good fence build in South Auckland starts before the first post goes in. Clear the site, choose sound timber sizes, set the posts firmly and check every line at the end. If you are planning a new fence, book a free consultation and we will look at your site before we quote.
Frequently Asked Questions
How high can a fence be in Auckland without a building consent?
A fence up to 2.5 metres high is generally exempt from building consent. Planning rules may still limit the height in some locations, so check with Auckland Council before you build.
What post and rail sizes did you use for a 1.8 metre fence?
On this job we used 100/100 posts, 100/50 rails and 150/25 mm palings for a 1.8 metre fence. The right specification for your fence depends on the site, so we confirm it at the site visit.
Why clear bushes and weeds before building a fence?
Clearing gives the posts solid, straight ground and stops plants growing back against the new timber, where they hold moisture and push on the palings over time.
Do I need my neighbour’s agreement to build a boundary fence?
If the fence is on the boundary line, agree the plan with your neighbour first and put it in writing. It avoids disputes about height, position and cost later.
Projects Help Across Auckland
If this guide raised a question about your own home, the My Homes Construct Ltd team is here to help. We provide professional home-improvement services right across Auckland — North Shore, West Auckland, Central Auckland, East Auckland and South Auckland — along with the surrounding suburbs.
Every enquiry starts with free, no-obligation advice and a written quote. We're a registered building company and back our work with a workmanship warranty as per your quotation, so you can move forward with confidence.
When to Call a Professional
Plenty of home-improvement tasks are fine to tackle yourself, but it's worth knowing where the line is. If a job involves working at height, structural elements, water getting where it shouldn't, or anything you're not fully confident about, bringing in a professional is usually cheaper than fixing a DIY attempt that didn't hold up.
A good tradesperson also spots the things an untrained eye misses — the early warning signs that turn a small job today into a major repair next winter. If you're in any doubt, a free assessment costs nothing and gives you a clear, honest picture before you commit to anything.
Timing It Right in Auckland
Auckland's climate runs to its own calendar, and home-improvement projects go more smoothly when they're scheduled with that in mind. Booking weather-dependent work for a settled stretch avoids delays, and getting preventative jobs done before winter saves you from reacting once the heavy rain and coastal winds arrive.
If you're not sure where your property sits on that timeline, that's exactly the kind of thing a free assessment answers. We'll tell you honestly whether something needs attention now or can sensibly wait until the season suits.
A Quick Checklist for Auckland Homeowners
Whatever you decide to do next, a few simple principles will save you money and stress on any home-improvement job in Auckland.
- Act early — Auckland's wet, humid climate turns small problems into expensive ones faster than most people expect.
- Get it in writing — a clear, itemised written quote protects you and makes comparing options straightforward.
- Check it's a registered building company — it matters for quality, consent and warranty cover.
- Ask about the warranty — reputable Auckland tradespeople stand behind their workmanship, not just the materials.
- Think long-term value, not just the cheapest price — the lowest quote is rarely the best value once durability is factored in.
Keep these in mind and you'll avoid the most common — and most costly — mistakes we see on Auckland properties.
Need Professional Help in Auckland?
My Homes Construct Ltd provides expert projects and full home-improvement services across all Auckland suburbs. Get a free, no-obligation quote today.
This guide is published by registered Auckland builders — a registered Auckland building company covering gutters, roofing, renovation, painting, decks and civil construction.