
How to Install Gutter End Caps
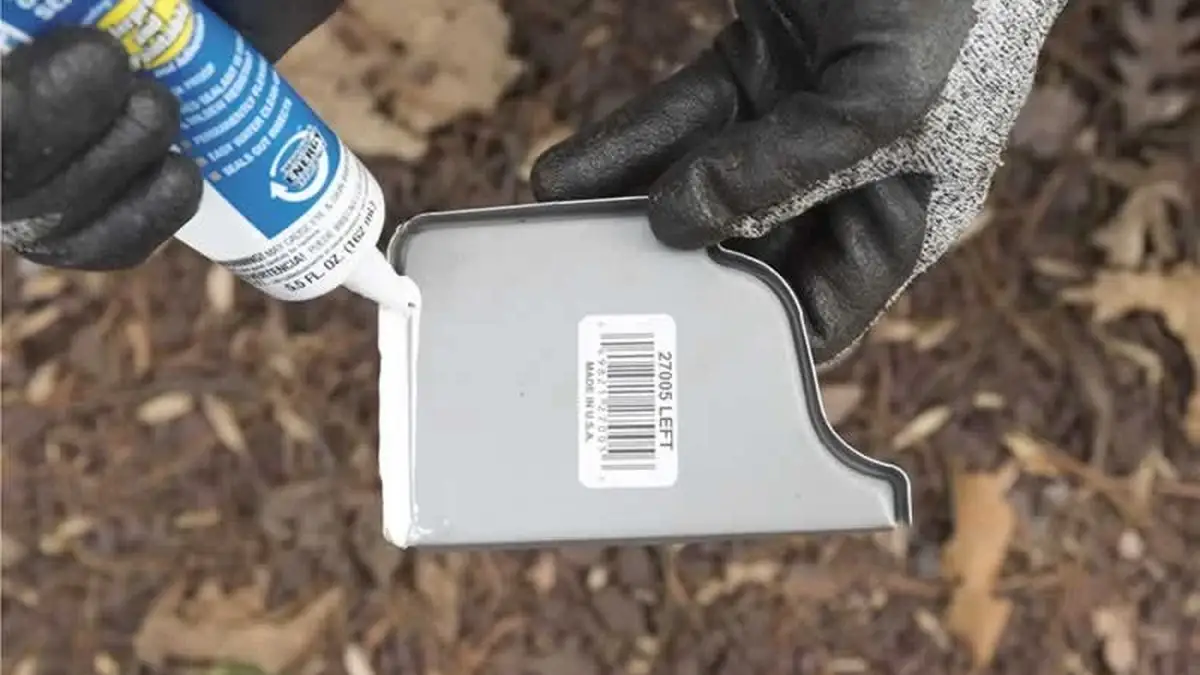
Quick answer: Learn how to seal gutter end caps in five steps: clean and dry the gutter end, run a continuous bead of sealant, press the correct left or right cap into place, fasten it with rivets or screws and test with a hose. Sealant is what makes the end cap watertight, so never skip it.
Gutter end caps are small, but a poorly fitted one is among the most common places for a gutter to drip. This guide explains how to seal gutter end caps properly, which cap fits which gutter, how to fix a cap that leaks and when the job is better left to a professional on your project.
What does a gutter end cap do?
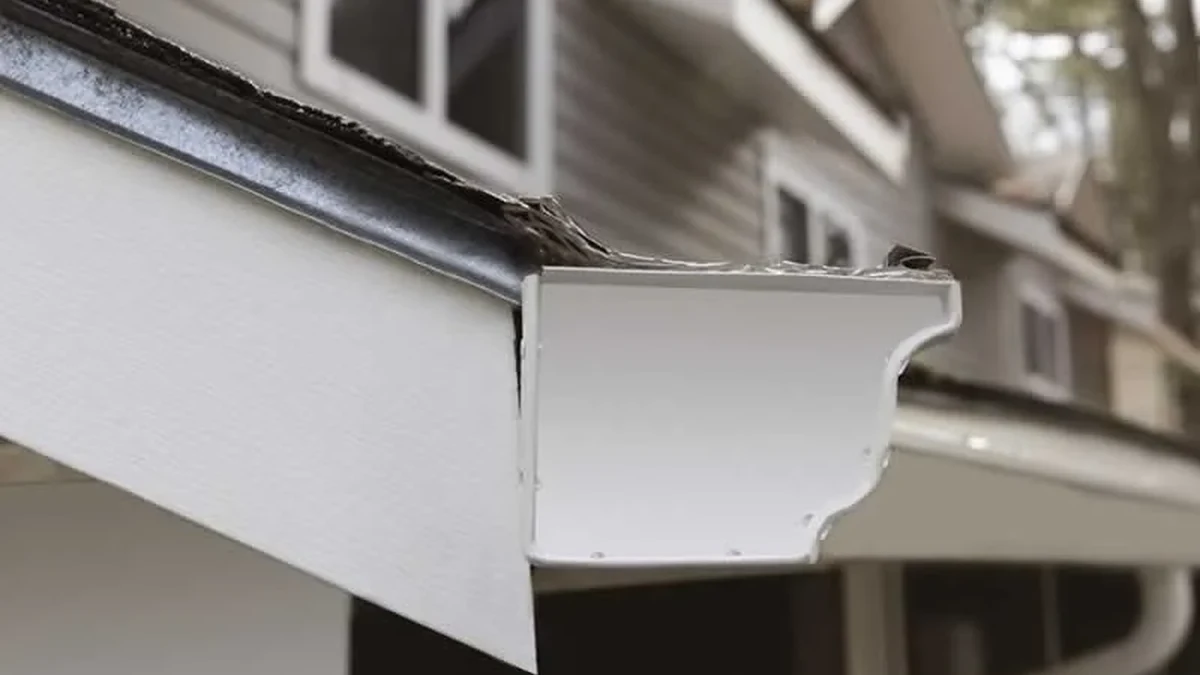
A gutter end cap closes the open end of a gutter run, so water stays in the channel and flows towards the downpipe instead of spilling out behind or below the gutter. It is a small fitting that takes the full weight of the water at the end of the run.
Because the cap is joined to the gutter by sealant and fixings rather than by the gutter’s own shape, it is also a joint that can open up over time. When a cap fails, water runs down the fascia or the wall and the damage shows up as stains, peeling paint or rot long before anyone notices the drip.
What tools and materials do you need to seal gutter end caps?
You need the right cap for your gutter, a sealant made for gutters, fixings and a few basic tools, plus a safe way to work at height.
- The end cap: the correct left or right version for your gutter’s material and profile.
- Gutter sealant: one that suits your gutter material and stays flexible outdoors. Check the label for curing time.
- Rivets or screws: corrosion-resistant fixings of the type the cap manufacturer recommends.
- A drill and a rivet gun or screwdriver: the rivet gun is essential if you are using rivets.
- A wire brush and cloth: to clean off dirt, rust and old sealant.
- A garden hose: to test the finished joint.
- Safety gear: gloves, goggles and a stable ladder, set up as the WorkSafe guidance under Sources describes.
How do you install a gutter end cap step by step?
Installing a gutter end cap takes five steps, and the sealant and the cleaning matter more than the fixings. Work on a dry day so the sealant bonds properly, and read the instructions on both the cap and the sealant first.
- Clean the gutter end. Remove old sealant, rust and dirt with a wire brush, wipe the surface clean and let it dry completely. Sealant will not hold on a wet or dusty surface.
- Apply the sealant. Run a continuous bead around the edge of the cap where it meets the gutter, covering the whole contact area with no gaps. A little squeeze-out is better than a gap.
- Position the cap. Check whether you need the left or right cap, then press it firmly onto the gutter end so it sits flush with the profile. Hold it still, or tape it, while you fix it.
- Fasten it. Fix the cap with rivets or screws spaced evenly around the flange, drilling pilot holes first. Do not overtighten, because that can distort the gutter and break the seal. Seal over screw heads if the manufacturer advises it.
- Test for leaks. Once the sealant has cured as its label says, run a hose into the gutter from the far end, starting gently and building up. Watch the cap and the area below it for any dripping.
If the cap still weeps, the fault is often a joint further along the run, so it is worth reading how to find and fix a leaking gutter.
Which end cap fits your gutter?
The right end cap matches your gutter’s material, profile and size, and it is made for either the left or the right end of the run.
| What to check | Why it matters |
|---|---|
| Left or right | Caps are handed, so a left cap on a right end will not seat properly |
| Material | Match the cap to the gutter, because mixed materials can leave gaps or corrode |
| Profile and size | A cap for one profile will not seal a different one, so check the gutter’s size before you buy |
| System | Use the same brand and system where you can, because their caps are made to fit their gutters |
If you are unsure, take a short offcut or a clear photo of the gutter end when you shop, or ask an installer to identify the system.
Why does a gutter end cap leak, and how do you fix it?
An end cap leaks when the sealant has failed, the cap does not sit flush or the gutter behind it has moved. The fix is almost always to remove the cap, clean both surfaces and fit it again with fresh sealant.
| Symptom | Likely cause | What to do |
|---|---|---|
| Drip at the edge of the cap | Sealant has cracked or lifted | Remove the cap, clean off the old sealant and reseal |
| Gap between cap and gutter | Wrong cap or a distorted gutter end | Check the fit and replace the cap if it does not sit flush |
| Water behind the cap | Gutter end bent or the run has sagged | Re-support the gutter before refitting the cap |
| Cap loose or rattling | Fixings loose or corroded | Replace the fixings with corrosion-resistant ones |
When should you call a professional?
Call a professional when the gutter end is high or the roof is steep, when the gutter itself is bent, cracked or sagging, or when the cap leaks again after you have resealed it. A cap that keeps failing is usually a symptom of a bigger problem in the run.
Our gutter repair service can reseal or replace caps, joints and damaged sections in one visit, and the guide to installing a gutter slip joint covers the neighbouring joint.
How do you keep gutter end caps watertight?
End caps stay watertight when the gutter is kept clear and the joints are checked now and then, because a blocked or sagging gutter loads the cap with extra water and weight.
- Clean the gutters at least twice a year, as a full channel pushes water against the cap.
- Look at each cap after heavy rain or wind, checking the sealant line for cracks.
- Reseal at the first sign of a drip instead of waiting for stains.
- Keep the gutter properly supported, as the guide to installing gutter brackets explains.
Sources and further reading: WorkSafe: working at height · Building Code clause E1 – surface water (building.govt.nz) · Building Code clause E2 – external moisture (building.govt.nz)
Related guides: how to install a gutter slip joint
Conclusion
A well-sealed end cap is a small job that prevents a lot of damage, and the keys are a clean dry surface, a continuous bead of sealant and the correct left or right cap. If the gutter is high, bent or leaking elsewhere, My Homes Construct Ltd offers a free written quote for your project.
Frequently Asked Questions
What are gutter end caps?
Gutter end caps are small fittings that close the open ends of a gutter run. They keep rainwater flowing to the downpipe and protect the fascia and walls from leaks.
Do gutter end caps need sealant?
Yes. Sealant creates the watertight seal between the cap and the gutter, and skipping it is the most common reason a new cap drips. Use a sealant made for gutters and suited to your gutter material.
Can you replace a gutter end cap without removing the gutter?
Usually yes. Drill out or undo the old fixings, clean the gutter end, then fit the new cap with fresh sealant. If the gutter end itself is damaged, the section may need repair or replacement.
How long does gutter sealant take to dry?
It depends on the product and the weather, so follow the curing time on the label. Wet or humid weather slows curing, so wait for the full time before you test with a strong flow of water.
What should I do if the end cap still leaks after installation?
Check for gaps in the sealant and loose fixings, then remove the cap, clean both surfaces and reseal it. If it keeps leaking, the gutter may be bent or sagging and needs a professional look.
Are there different end caps for different gutters?
Yes. Caps vary by material and profile and come in left and right versions. Match the cap to your gutter’s material and size so it sits flush and does not corrode.
Gutter Help Across Auckland
Reading up is a smart first step, but every Auckland property is a little different. For advice tailored to your own home, My Homes Construct Ltd offers free assessments and written quotes for gutter cleaning, repair and replacement across all Auckland regions and suburbs.
We respond to enquiries the same business day, explain your options in plain language, and stand behind every job with a workmanship warranty — no pressure and no hidden costs.
When to Call a Professional
Plenty of gutter cleaning, repair and replacement tasks are fine to tackle yourself, but it's worth knowing where the line is. If a job involves working at height, structural elements, water getting where it shouldn't, or anything you're not fully confident about, bringing in a professional is usually cheaper than fixing a DIY attempt that didn't hold up.
A good tradesperson also spots the things an untrained eye misses — the early warning signs that turn a small job today into a major repair next winter. If you're in any doubt, a free assessment costs nothing and gives you a clear, honest picture before you commit to anything.
Timing It Right in Auckland
Timing matters more than most Auckland homeowners realise with gutter cleaning, repair and replacement work. The drier spells from late spring through summer are ideal for anything weather-sensitive, while the wetter winter months are when hidden faults tend to reveal themselves — which makes autumn a smart time for a preventative check before the rain sets in.
Planning ahead also means you're not scrambling for an emergency call-out at the worst possible moment. A quick seasonal inspection costs little and often catches the small issues that would otherwise become urgent — and expensive — repairs once Auckland's weather turns.
A Quick Checklist for Auckland Homeowners
Whatever you decide to do next, a few simple principles will save you money and stress on any gutter cleaning, repair and replacement job in Auckland.
- Act early — Auckland's wet, humid climate turns small problems into expensive ones faster than most people expect.
- Get it in writing — a clear, itemised written quote protects you and makes comparing options straightforward.
- Check it's a registered building company — it matters for quality, consent and warranty cover.
- Ask about the warranty — reputable Auckland tradespeople stand behind their workmanship, not just the materials.
- Think long-term value, not just the cheapest price — the lowest quote is rarely the best value once durability is factored in.
Keep these in mind and you'll avoid the most common — and most costly — mistakes we see on Auckland properties.
Need Professional Help in Auckland?
My Homes Construct Ltd provides expert gutter and full home-improvement services across all Auckland suburbs. Get a free, no-obligation quote today.
This guide is published by Auckland construction and home renovation company — a registered Auckland building company covering gutters, roofing, renovation, painting, decks and civil construction.