
How to Install a Gutter Slip Joint
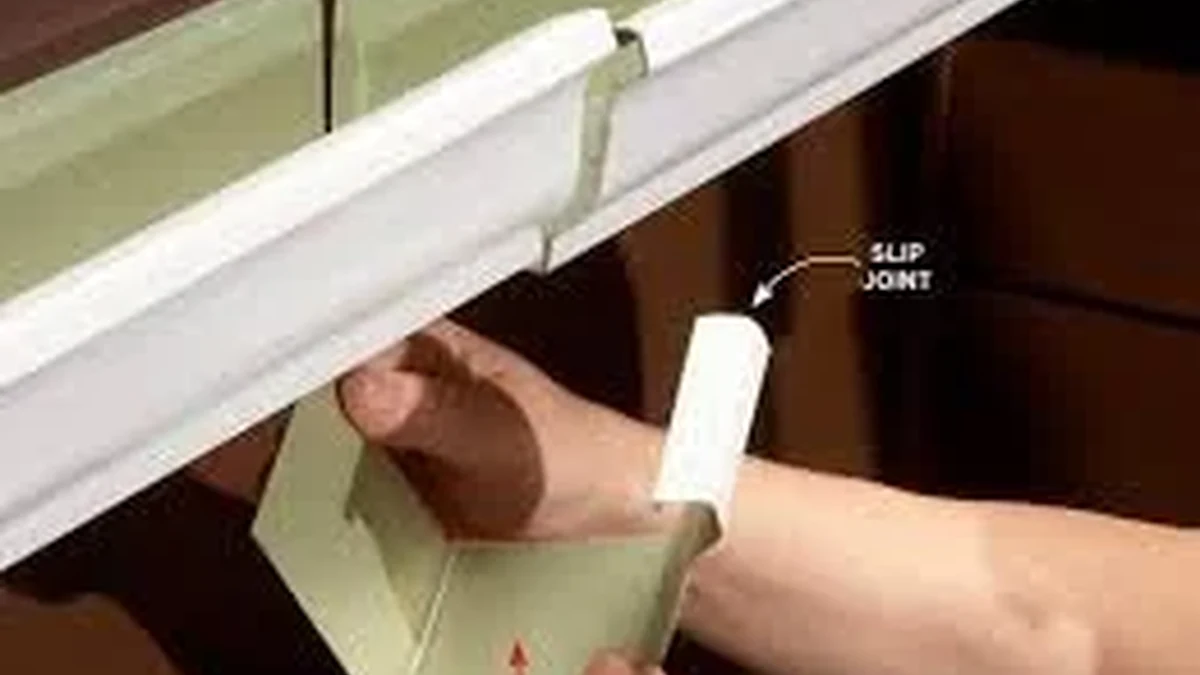
Quick answer: A gutter slip joint joins two lengths of gutter, seals the join and lets the gutter expand and contract. Clean and dry both ends, check the fit and the fall, seal and slide the joint on, fasten it as the maker specifies, then run water through to test for leaks.
Where two lengths of gutter meet, water can escape and the metal or plastic moves as the temperature changes. A slip joint is the fitting that deals with both. This guide shows how to install slip joint gutter connector fittings in the order the work is done.
It suits a careful homeowner repairing a short run, and it explains where the job should go to a professional. The exact overlap, fall and fixing method depend on your gutter system, so the maker’s instructions always come first.
What is a gutter slip joint and what does it do?
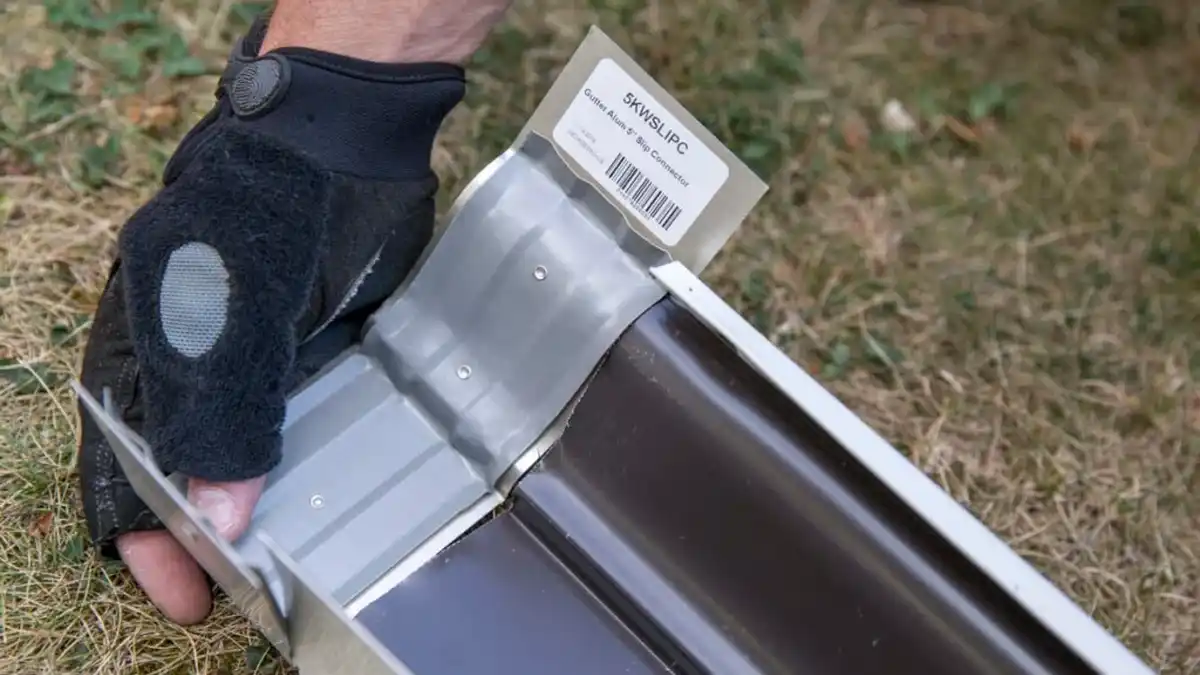
A gutter slip joint is a connector that joins two gutter lengths and keeps the join watertight while letting the gutter move slightly as it warms and cools.
- It joins lengths. The connector overlaps both gutter ends, so water passes from one length to the next.
- It seals the join. A sealant or a built-in seal stops water escaping at the connection.
- It allows for movement. Gutters expand and contract with temperature, and long runs can buckle if they are fixed rigidly.
If you are fixing a leaking join that already exists, our guide to fixing a leaking gutter joint covers cleaning, resealing and re-fixing it.
When do you need a gutter slip joint?
You need a slip joint where two lengths meet, where a damaged section is replaced, or where a long run needs room to move. You do not need one on every section.
| Situation | Is a slip joint needed? | Notes |
|---|---|---|
| Joining two lengths of gutter | Yes | The connector must match your gutter profile and material |
| Replacing a damaged section | Usually | A new section is connected to the old run at each end |
| A long straight run | Often | Allows the gutter to expand and contract without buckling |
| A seamless gutter | Rarely | Only for an extension or repair; ask the installer |
| A gutter that is rusted through or sagging | No | The gutter needs repair or replacement, not just a connector |
What tools and materials do you need?
Gather everything before you climb the ladder, because stopping halfway leaves the join open to the weather.
- The slip joint connector. It must match your gutter material and profile; metal gutters need a metal connector and plastic systems need a matching plastic one.
- Sealant suited to your gutter material, recommended by the gutter maker.
- Corrosion-resistant screws or clips, because Auckland’s coastal air attacks ordinary fixings.
- A drill, tape measure, marker and level.
- A stable ladder, gloves, eye protection and non-slip shoes.
- A hose to test the finished join.
Check the gutter material before buying a connector, because mismatched materials give a poor fit and wear quickly.
How do you stay safe working on a gutter?
Gutter work is working at height, so set up the ladder and your own safety before you touch the gutter.
- Stand the ladder on firm, level ground and use a stabiliser or have a helper hold the base.
- Keep your body inside the ladder rails and do not lean out to reach.
- Wear gloves, because cut gutter edges are sharp.
- Do not work in rain or strong wind, and keep clear of power lines.
Read WorkSafe’s guidance on working at height before you start, and use scaffolding or a professional for anything above the first storey.
How to install slip joint gutter connector: step by step
Installing a slip joint follows the same six steps for most gutter systems. Follow the manufacturer’s instructions for the exact overlap, fall and fixings.
- Clean and prepare the gutter ends. Remove leaves, dirt and old sealant from both ends, rinse them, and let them dry so that the sealant can grip.
- Measure and align the joint. Check that the connector covers both gutter ends with the overlap the maker specifies, mark the position, and check with a level that the gutter still falls toward the downpipe.
- Apply sealant. Run a continuous bead along the inner edges of the connector, using sealant that suits your gutter material and outdoor use.
- Slide the joint into place. Fit it over both gutter ends so that the sealant makes full contact, keep the gutter’s fall and profile, and wipe away excess sealant.
- Fasten it. Fix it with corrosion-resistant screws or clips as the maker specifies, drilling pilot holes first in plastic to avoid cracking it, and do not over-tighten.
- Test for leaks. Run water from the high end of the gutter with a hose, watch the joint for drips or pooling, and check that the downpipe flows freely.
If water leaks, dry the area, reseal and re-fix the joint, then test again. A follow-up check after the next heavy rain is worth the effort.
What mistakes should you avoid?
Most slip joint failures come from a few avoidable mistakes, and each one is easy to prevent.
- Using the wrong sealant. Sealant that is not rated for outdoor use or for your gutter material breaks down quickly.
- Skipping the cleaning. Debris or old sealant stops a tight seal and causes leaks.
- Losing the fall. A flat or reversed fall makes water pool and stresses the join.
- Over-tightening fixings. This can crack plastic gutters or warp metal ones.
- Fixing a worn-out gutter with a connector. A connector does not repair rusted or sagging metal.
Our guides to installing gutter brackets and installing gutter end caps cover the other fittings that keep a run secure.
How do you keep a slip joint working?
A slip joint keeps working when you inspect it regularly, because sealant ages and fixings can loosen.
- Check each joint at least once a year, and after storms or high winds, for corrosion, cracks and loose screws.
- Keep the gutter clear so that water does not pool at the joint.
- Reseal as soon as you see a drip, before water reaches the fascia.
When should you call a professional?
Call a professional when the job is beyond a short, low run or when the gutter itself is the problem.
- Sagging or misaligned gutters that need the fall reset or the brackets replaced.
- Extensive damage, where cracked or rusted sections need replacing.
- Multi-storey homes, where scaffolding or access equipment is needed.
- Complex systems, such as long runs, several downpipes or heritage homes.
Our gutter services cover repairs and replacement, and you can request a free quote for an assessment of your project. Capacity and overflow are covered by Building Code clauses E1 and E2, so ask an installer if the system seems undersized.
Sources and further reading: WorkSafe: working at height · Building Code clause E1 – surface water (building.govt.nz) · Building Code clause E2 – external moisture (building.govt.nz)
Related guides: How to install a gutter apron · How to install gutter hangers
Conclusion
A gutter slip joint is a small fitting that does an important job: it joins lengths, seals the join and lets the gutter move. Match the connector to your gutter, follow the maker’s instructions, test with water, and ask a professional when the gutter is rusted, sagging or out of safe reach.
Frequently Asked Questions
What is a gutter slip joint?
A gutter slip joint is a connector that joins two gutter sections, seals the join and allows the gutter to expand and contract with temperature. It is used where lengths meet, where a section has been replaced or on long runs.
Can you install a slip joint without sealant?
Not unless the system uses a built-in seal. Most slip joints need sealant or a gasket to be watertight, so follow the manufacturer’s instructions for your gutter system.
Do I need a slip joint on every gutter section?
No. Slip joints are needed only where two lengths meet, where a section is repaired or where a long run needs room to move. Seamless gutters have fewer joins and rarely need one.
Can I use a slip joint on seamless gutters?
Yes, but usually only for an extension or a repair. Seamless gutters are formed to avoid joins, so ask a professional before adding one.
How do I know if I need a new gutter instead of a slip joint?
If the gutter is rusted through, cracked or sagging despite repairs, replace the section or the system. A connector fixes a join, not a worn-out channel.
Gutter Help Across Auckland
Reading up is a smart first step, but every Auckland property is a little different. For advice tailored to your own home, My Homes Construct Ltd offers free assessments and written quotes for gutter cleaning, repair and replacement across all Auckland regions and suburbs.
We respond to enquiries the same business day, explain your options in plain language, and stand behind every job with a workmanship warranty — no pressure and no hidden costs.
When to Call a Professional
Plenty of gutter cleaning, repair and replacement tasks are fine to tackle yourself, but it's worth knowing where the line is. If a job involves working at height, structural elements, water getting where it shouldn't, or anything you're not fully confident about, bringing in a professional is usually cheaper than fixing a DIY attempt that didn't hold up.
A good tradesperson also spots the things an untrained eye misses — the early warning signs that turn a small job today into a major repair next winter. If you're in any doubt, a free assessment costs nothing and gives you a clear, honest picture before you commit to anything.
Timing It Right in Auckland
Auckland's climate runs to its own calendar, and gutter cleaning, repair and replacement projects go more smoothly when they're scheduled with that in mind. Booking weather-dependent work for a settled stretch avoids delays, and getting preventative jobs done before winter saves you from reacting once the heavy rain and coastal winds arrive.
If you're not sure where your property sits on that timeline, that's exactly the kind of thing a free assessment answers. We'll tell you honestly whether something needs attention now or can sensibly wait until the season suits.
A Quick Checklist for Auckland Homeowners
Whatever you decide to do next, a few simple principles will save you money and stress on any gutter cleaning, repair and replacement job in Auckland.
- Act early — Auckland's wet, humid climate turns small problems into expensive ones faster than most people expect.
- Get it in writing — a clear, itemised written quote protects you and makes comparing options straightforward.
- Check it's a registered building company — it matters for quality, consent and warranty cover.
- Ask about the warranty — reputable Auckland tradespeople stand behind their workmanship, not just the materials.
- Think long-term value, not just the cheapest price — the lowest quote is rarely the best value once durability is factored in.
Keep these in mind and you'll avoid the most common — and most costly — mistakes we see on Auckland properties.
Need Professional Help in Auckland?
My Homes Construct Ltd provides expert gutter and full home-improvement services across all Auckland suburbs. Get a free, no-obligation quote today.
This guide is published by registered Auckland builders — a registered Auckland building company covering gutters, roofing, renovation, painting, decks and civil construction.